Want to improve your photographs of birthday parties, weddings, anniversaries and other social events? These tips can be applied whether you’re shooting a birthday party with a point-in-shoot model or a wedding with a top-of-the-line digital SLR.
Read that manual
I know you really don’t want to, but knowing your camera’s capabilities will help you grow as a photographer. Learn how to change the ISO settings for different shooting situations. And while you’re at it, please turn off the date/time stamp. Nothing says “amateur” more than that feature!
Get out of your comfort zone
Yes, you can get great photos by setting your camera to “auto.” But if you learn what your camera can do in other modes, your photographs will improve immeasurably. Practice shooting with your camera in program or auto mode to get comfortable with your equipment. Your can take your time and learn all the bells and whistles later. The wonderful thing about digital photography is that when you experiment, the results are immediate! Shoot with your on-camera flash. Add a flash that can swivel and tilt and bounce. Try shooting an image in low light and increase your ISO settings. You can always supplement with flash if the results aren’t what you expected.
 Talking about resolution
Buy the largest memory card you can afford. I shoot with 2gb and 4gb cards and have dozens of them! They’re very affordable, and although you might not need dozens of them, do have a few extras on hand. On most cameras, your image resolution will be labeled as Large/Fine, Medium and Small/Normal. Your highest setting may read Superfine. Set your camera to the highest resolution available. This ensures you will get the most of your camera’s capabilities. You can always size down an image; you can’t size one up! Yes, you’ll fill up your card quicker, but you’ll also get the optimum quality for your images. When I instruct someone to change their resolution to “fine,” they will invariably say, “but I can get 800 shots if I set it on normal.” That’s one reason why your photos aren’t as good as they could be! You may have heard the digital term “raw”—this image type is sometimes used by photographers who want to do extensive computer processing with their images. Unless you have the software to process raw images, you’ll be fine starting with the highest jpg setting.
Brace yourself
Hold your arms to your side and take a deep, calm breath right before you squeeze the shutter. This will ensure shake-free shooting. If you still have out-of-focus images, use a tripod or monopod if the situation will allow. You can also steady your body by leaning against a rigid structure.
 Here comes the sun
Work that light. Great light = great photographs. Avoid direct sunlight, especially with portraits—it produces harsh shadows. Move your subject into the shade. Most digital cameras have a fill flash or “flash on” mode. In the flash-on mode, your camera will expose for the background, then add just enough “fill” flash to illuminate your subject. Use fill flash to open up the shadows in the shade or change your ISO to a higher speed before shooting.
Put a little light on the subject
I rarely use direct flash. If your digital camera has a pop-up flash, you can add Garry Fong’s $20 Puffer, a flash diffuser that slides into the hotshoe on top of your camera. It will change your flash photography! If you can afford a detachable flash that can swivel and tilt, your photographs will improve even more. I shoot events, weddings, and parties with my Nikon Speedlight with a $20 Sto-fen Omni Bounce attached to diffuse the light. There are many flash-modifying products on the market that are both effective and inexpensive. Most digital camera flashes have a range of about 6 to 10 feet. If your subject is outside that flash range, the image will be either too light or too dark. Check your manual to determine what your camera’s flash range is.
 Warm it up
Your digital camera most likely allows you to change the “white balance.” White balance (WB) removes unrealistic color casts so that objects that are white in person show up as white in your photo. Most digital cameras today tend to automatically adjust white balance, but you can modify the settings when you encounter unusual lighting situations. In point-n-shoot cameras, you’ll see white balance options labeled with icons such as a sun, cloud, lightening bolt, etc. Each of these icons represents a particular shooting situation. For instance, a photo made indoors while it’s cloudy outside will render the scene a bit more blue than it actually is. Set your white balance to “cloudy,” and the scene will be instantly rendered golden! And if you’re shooting portraits outdoors or a landscape lit by the sun, try setting your white balance to “cloudy.” This simple adjustment has the same effect as putting a warming filter on your lens, resulting in richer, warmer photographs.
 Compose yourself
Keep your horizon level (unless you want an intentionally crooked shot!). Crop out elements in your photo that are distracting. Move your subject if you can’t move the distracting element. Shoot some images utilizing the “rule of thirds.” Painters have been using this compositional rule of thumb since Grecian times. You can add dramatic interest by placing your subject in any one of the four points where the lines cross. Not all of your shots have to use the rule of thirds, but it’s a great starting point if you’re “compositionally-challenged.” With practice, it will come naturally!
 Become an art director
Set the scene, bring in props. Study books on posing and learn how to direct your subject’s hands. Avoid having someone put their arm around their companion and having “the claw” coming over a shoulder. If you’re shooting a family portrait, have one or two people stand, while another other subject sits. Turn your subjects toward each other slightly and close in gaps. This creates dynamic compositions and draws your viewer in.
 The vertical challenge
Many beginning photographers shoot everything in landscape (horizontal mode). Mix it up and shoot the same scene vertically (portrait mode). If you’re photographing a couple, shoot them full length vertically, then turn the camera horizontally and move in for a waist-up or shoulders-up portrait. Study scenes and determine whether the subject would be best portrayed vertically or horizontally. If you’re unsure, shoot it both ways. The more you practice, the easier it becomes easier to determine what orientation a shot should be.
Change your perspective
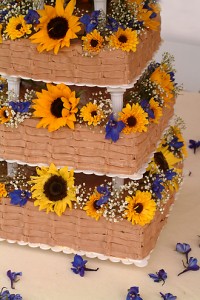
Shoot high, shoot low. Climb up a set of steps or stand on a chair and shoot down on your subject. When photographing children, crouch down to eye level. Frame your shots on an angle. If you have a camera with interchangeable lenses, use them! Get a wide shot of the entire wedding party, then switch lenses and get a closeup of the sugared roses on that beautiful cake. Shoot your subject off-center if the background has an interesting painting, architectural element, or floral arrangement. Most cameras will focus on what is in the middle of the frame, so be sure to lock the focus on your subject before you reframe it off-center. Get up close and personal. Don’t be shy—if the situation allows, move in closer to your subject for a different perspective and more impact. Don’t try to photograph a couple from six feet away if you can move closer! Fill the frame with your subject.
 Watch that background
Before you shoot, survey the background. Are there people milling about? Cars passing by? Wait for them to pass before you squeeze the trigger. Avoid harsh shadows from the flash indoors or sunlight outdoors by moving your subjects away from walls. Be sure there isn’t a tree or light pole “sprouting” from your subject’s head. The single most important thing you can do to improve your photographs, whether portraits, plants or places, is to pay attention to the matter behind your subject. Eliminate anything distracting that doesn’t add to the image. What you don’t shoot is just as important as what you do shoot!
 Tell me a story
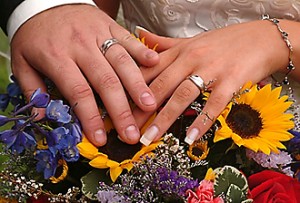
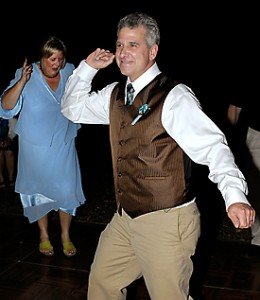
Let your photographs tell a story. Capture the smallest of details: close-ups of the cake, the back of a gown, a shot of the bouquet, the table decorations. Mix it up! Shoot posed photos and candids, groups and singles. Capture the spirit of the people and the party. Photograph guests hugging, dancing, eating, and laughing. Look for tender moments between couples, megawatt smiles, and laughter. Shoot with abandon!
 And finally…
You can download your photos directly to your computer, but I recommend that you buy a memory card reader. They’re very affordable (some less than $20) and some come with multiple slots that will hold Micro SD, SD, and Compact Flash (CF) cards. And don’t forget to back up those images in at least two places—portable hard drives are reasonably priced and worth every penny. I store my images on three separate drives. If you store your images on your computer and don’t have one or two backups, what happens when your drive crashes and can’t be fixed? All those precious images are just memories! One more thing—keep your camera and flash batteries charged and always have a spare (or two) ready!
Cindy Dyer is a freelance graphic designer and photographer in Alexandria, Virginia. Visit her blog at www.cindydyer.wordpress.com and view her botanical gallery at www.cindydyer.zenfolio.com. She can reached at dyerdesign@aol.com. All photos © Cindy Dyer.
This photography article was brought to you by Wedding and Party Network


Leave a Reply